How to Plan E-Bike Charging for a Work Commute
Your round-trip commute is 28 miles, and your e-bike's real-world range is right around 32. On a calm Tuesday in May, you roll into your driveway with one bar left. On a windy Thursday in November—or the day you need to swing by the pharmacy after work—that last mile turns into a slow, unassisted slog.
When your round trip sits uncomfortably close to your battery's ceiling, you have two choices: buy a bike with a bigger battery, or plug in while you are at work.
Work charging cuts your battery's job in half. Instead of nursing Eco mode both ways and staring at the handlebar gauge on every hill, you treat the morning ride and the evening ride as two separate trips.
If you are still shopping and trying to size a battery from scratch, use our commute range calculation worksheet or start with our pillar guide, How to Choose an E-Bike for Your Daily Commute. This guide is for riders who already have a commute in mind—or a bike in the hallway—and need a practical, low-friction plan for charging during the workday: deciding whether you actually need to plug in at work, checking your battery setup, getting workplace permission, packing the right gear, and building a routine you won't forget at 5:00 PM.
Do You Actually Need to Charge at Work?
Plugging in at the office adds a couple of small steps to your morning and evening, so start by confirming whether your commute genuinely calls for it.
Charging at work makes sense if:
- Your home arrival margin is tight: After a normal round trip, your battery regularly lands in its bottom quarter, leaving you almost no cushion for detours or battery aging.
- You ride in higher assist to beat the clock: You want to use moderate-to-high pedal assist on your morning ride so you arrive at your desk cool and on time, without rationing power for the evening trip home.
- One direction is a serious climb: Your route home gains significant elevation that eats through your remaining bars.
- Winter shrinks your buffer: Cold temperatures temporarily reduce usable lithium-ion capacity, turning a comfortable summer round trip into a borderline winter one (see our seasonal guide, Winter Care & Riding Tips for Electric Bikes, and our deep dive into what affects e-bike range).
- Your battery lives in an unpowered shed at home: If your apartment bike room or shared garage has no outlets, charging at work may actually be easier than charging at home.
You can skip work charging if:
- You consistently arrive home from a round trip with roughly a third of your battery still showing on the display, even in a headwind.
Quick test: Track your battery gauge at the end of five consecutive round trips. If you finish the week glancing nervously at the last bar on the ride home, a workplace charging routine will change how the whole ride feels.

Step 1: Check Whether Your Battery Is Removable
This single hardware detail decides your entire workplace strategy.
Most offices, retail workplaces, and commercial buildings will not let you wheel a full-size bicycle past the lobby turnstiles and park it next to your desk—fire codes, narrow hallways, elevator rules, and wet tires make that a hard sell.
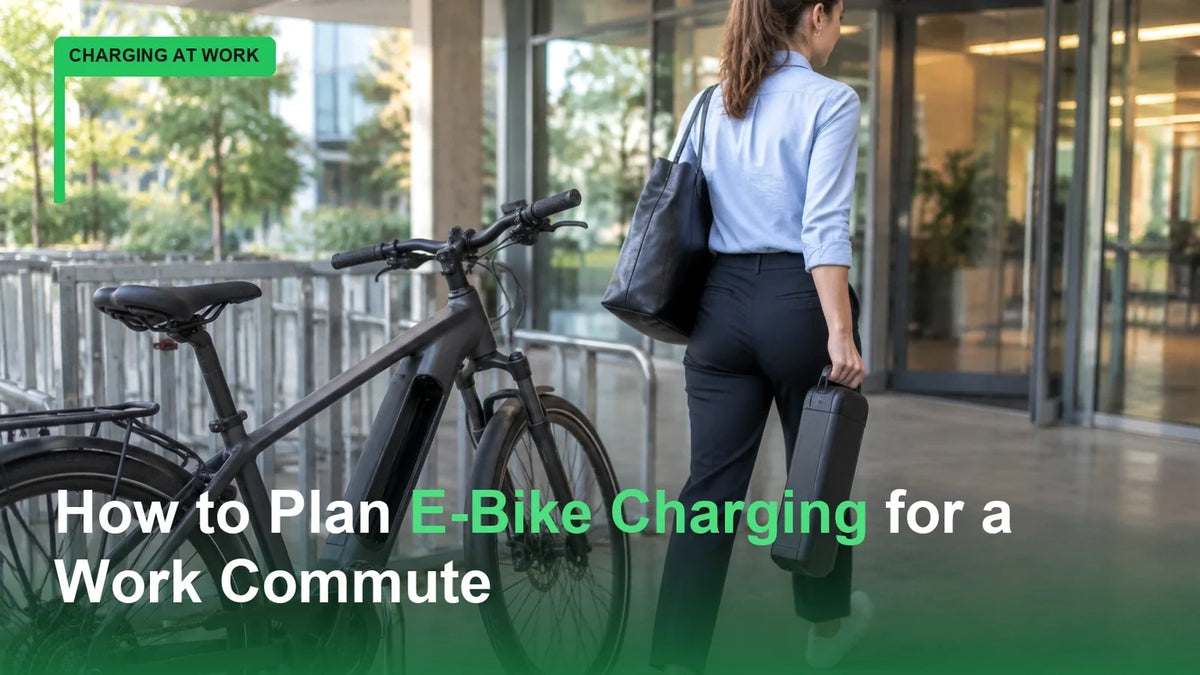
- If your battery is removable: You lock the bike frame outside or in the building's bike cage, unlock the battery pack with its key, and carry just the battery indoors to charge where outlets are easy to reach.
- If your battery is fixed (integrated inside the frame): The outlet has to come to the bike. You will need a parking spot in a garage, bike room, or covered service area with a wall receptacle within reach of your charger cord.
How to verify your setup:
- Check your owner's manual or the manufacturer's official specification sheet—never guess from a photo alone, since many modern removable batteries sit flush inside the downtube.
- Look for a keyhole on the side of the frame tube, behind the seat tube, or under the rear rack, and confirm you can unlock and slide the pack out cleanly without tools.
- If you are currently comparing commuter models on the UrlifeBike electric bike collection, check each model's specification list for a removable, key-locked battery before you order, since indoor charging is far simpler when the pack lifts off the frame.
Step 2: Know Your Charging Time and Charger Rules
Before you ask your workplace where to plug in, look up how long your specific battery takes to charge—and remember that you rarely need a full 0% to 100% charge at work.
Full charge vs. workday top-up
Every e-bike battery and charger pair has its own charging duration, which is listed in the owner's manual or on the product spec sheet. Depending on the battery's watt-hour capacity and the charger's output rating (printed on the charger label in volts and amps), a full charge from empty takes several hours.
At work, however, you are only replacing the energy you spent on the morning leg. Illustrative planning example (not a measurement for a specific model): Suppose your morning ride uses roughly 40% of your battery capacity, leaving you at 60% when you lock up at 8:45 AM; you do not need a full empty-to-full cycle to get home comfortably—even two or three hours on the charger over mid-day can put back plenty of buffer for the evening ride, and a standard eight-hour shift is more than enough time for most commuter packs to finish topping off and shut off automatically. (Always check the stated charging time in your bike's manual for your exact pack and charger.)
The non-negotiable charger rule: original equipment only
When planning a work charging setup, only use the original charger supplied with your bike, or an exact replacement charger purchased from or explicitly approved by your bike's manufacturer.
As noted in STOER Bikes' workplace charging guide, an original manufacturer charger has its charging curve and protection parameters matched directly to your battery's internal battery management system (BMS). Never buy a cheap "universal" third-party charger to keep at the office, and never borrow a coworker's charger just because the plug happens to fit your charging port. Using an unapproved or mismatched charger can damage the cells, void your warranty, or create a serious fire hazard.
For federal safety background on lithium-ion e-bike batteries, chargers, and BMS protection, consult the CPSC Micromobility Information Center and the CPSC staff technical statement on e-bike battery testing. To understand how your battery, BMS, and controller interact, see Understanding the Core Components of an Electric Bike.
Step 3: Find (and Clear) a Charging Location at Work
Do not just walk in on Monday with a ten-pound battery brick and plug it into the nearest hallway socket. Facilities managers care about tripped breakers, blocked walkways, and building fire policies—and a two-minute conversation upfront prevents an awkward email later.
Best spots for a removable battery (indoor charging)
- At your desk or workstation: Standard e-bike chargers plug into an ordinary 110–120V household wall outlet and draw power in the same general ballpark as a high-powered laptop or desktop workstation brick. If your employer allows personal electronics at desks, a clear, hard floor surface near your desk is the easiest option because you are right there to keep an eye on it.
- A designated storage room, locker area, or mailroom: In retail, healthcare, warehouse, or lab jobs where you do not sit at a desk, ask a manager or facilities lead if there is a dry, ventilated staff area with an open wall outlet away from foot traffic.
Best spots for a non-removable battery (full-bike charging)
- A dedicated indoor bike room: Many modern office buildings and campuses include standard 120V outlets inside the keycard bike cage specifically for e-bike commuters.
- Covered parking garage or loading dock: If you park in an underground or covered employee garage, ask building security or facilities whether there is a designated wall receptacle near the bike rack where you are permitted to plug in.
Three questions to ask facilities or HR
Keep the request simple and practical:
- "I commute by e-bike—does the building have a preferred spot or policy for plugging in a removable battery during work hours?"
- "Is there an outlet in the bike room or garage I have permission to use, or should I plug the battery in at my workstation?"
- "Are there any building rules I should follow, such as plugging directly into a wall receptacle rather than a cubicle power strip?"
Places to avoid completely:
- Never plug into an outdoor outlet without explicit permission from the property owner.
- Never leave an expensive charger and unlocked battery sitting unattended at a public sidewalk rack.
- Never charge a battery in a damp bathroom, next to a kitchen sink, blocking an exit door, or tucked under a pile of coats or paper.
Step 4: Pack the Right Work-Charging Kit
Having to unplug your home charger from behind the sofa every morning guarantees that one Tuesday you will arrive at work and realize the charger is still sitting on your kitchen counter.
If you charge at work more than once a week, simplify the hardware:
- Your original charger (or a second manufacturer-approved charger kept at work): If your bike's manufacturer sells an official spare charger for your exact model, leaving one permanently in your desk drawer is the single best quality-of-life upgrade for a long commuter. You never carry the brick in your bag, and you never forget it.
- Your battery key on your main keyring: If your battery locks to the frame, keep the battery key on the same ring as your bike U-lock key—or keep a labeled spare key in your work bag. Discovering you left the battery key at home means the battery stays locked to the bike all day.
- A padded tote or pannier compartment: Removable batteries are dense and have metal mounting rails or electrical contacts on the bottom. Sliding the pack into a dedicated pannier sleeve or canvas tote keeps it from scratching your laptop, protects the plastic casing if you bump a doorframe, and keeps you from feeling like you are carrying car parts through the elevator lobby.
- A velcro cable wrap and name tag: Office chargers all look like black plastic bricks. Put a piece of tape with your name and phone number on your charger, and keep the cords neatly wrapped so they never create a tripping hazard around your desk.
Step 5: Build a Foolproof Daily Charging Routine
Once you have a spot and the gear, turn the process into a habit you don't have to think about.

The four-step workday rhythm
- Morning lock-up (Arrival): Lock your frame and wheels to the rack first, turn the bike's power button off, unlock and slide out the battery, and snap any rubber weather cover over the bike's exposed frame terminals if you parked outdoors.
- Cold-morning pause + plug-in (Mid-morning): Bring the battery inside. If you just rode through freezing winter weather, let the battery sit indoors and warm up to room temperature before plugging it in (follow your manual's charging temperature guidelines). Then plug the charger in and check that the indicator light shows normal charging.
- Mid-day or afternoon check (Unplug when done): STOER Bikes' workplace charging guidance recommends glancing at the battery and charger periodically (such as every 30 to 60 minutes) while it is plugged in at work to make sure nothing is abnormally warm. Remember you don't have to force a 100% charge if a partial top-up easily covers your ride home. Once the indicator turns green (or reaches the level you need), unplug the charger rather than leaving it connected after hours.
- Evening click-and-lock check (Departure): Slide the battery back into the frame mount until you hear or feel it latch, turn the key to lock it, and give the pack a firm tug by hand before riding off. An unlocked battery that bounces out on the first pothole outside the parking garage is an expensive mistake.
Five Backup Strategies If You Cannot Charge at Work
What if your building manager says no—full stop—to bringing batteries inside, and the outdoor rack has no outlets? You still have options:
- Trim your energy draw on the ride in: Dropping one pedal-assist level on flat sections and keeping your tires inflated to their sidewall PSI specification can easily save enough battery in the morning to get you home without plugging in. (Read our full guide on what affects e-bike range for the highest-impact habits.)
- Take the flatter route home: Use your map app's elevation view to swap a steep direct climb for a slightly longer river path or gentle grade on the evening leg.
- Combine your bike with transit one way: On days with a brutal headwind or freezing temperatures, ride the e-bike to work in the morning and take the train or bus part of the way home (after checking your transit agency's bike rules).
- Top up during a lunch stop (with permission): If you work near a bike-friendly café, coworking space, or community center where you are a regular paying customer, politely ask whether they mind you plugging in for an hour while you eat lunch at a table right next to the outlet.
- Step up in battery capacity on your next bike: If your workplace permanently bans charging and your commute is 25+ miles round trip, solve the problem on the hardware side by choosing a higher-watt-hour battery or keeping a second manufacturer-approved battery pack charged at home.
Workplace Charging Safety and Office Etiquette
Good habits keep both your battery healthy and your workplace welcoming to e-bike commuters. Building on federal CPSC guidance and workplace best practices from STOER Bikes:
- Stay present and never charge overnight at an empty office: Only charge the battery while you are actually in the building during your shift, and pick a spot near a working smoke detector.
- Keep the battery on a flat, non-flammable surface: Rest the battery and charger brick on a bare floor, metal shelf, or clear desk corner in a ventilated spot out of direct sunlight—never on a couch cushion, carpet pile, or stack of papers and clothing that traps heat.
- Use wall outlets and smart cable routing: Plug directly into a fixed wall receptacle whenever possible. If you must use a power strip, make sure it has built-in overload protection, never daisy-chain multiple power strips together, and never run charging cables across office walkways.
- Know the immediate "no-go" signs: If a battery has been dropped on pavement, shows a cracked casing, emits an unusual odor, has frayed charger cables, or gets abnormally hot during charging, unplug it immediately and have it inspected by the manufacturer or a qualified technician.
- Be a good office neighbor: Always ask before using a shared outlet, label your charger with your name, and thank your facilities or security team for making bike commuting easier.
Conclusion: Cut Range Anxiety in Half
You do not need to charge at work for every commute. If your battery already gets you home with bars to spare, plugging in overnight at home is all the routine you need.
When your round trip pushes the limits of a single charge, however, a simple workplace charging setup changes everything. With a removable battery, your original manufacturer-supplied charger, and a quick green light from your building manager, a 30-mile round trip stops feeling like an endurance test and starts feeling like two easy 15-mile rides.
Planning your full commuter setup? Check our pre-purchase E-Bike Commuter Buying Checklist, read our complete guide on How to Choose an E-Bike for Your Daily Commute, or browse the UrlifeBike electric bike collection to explore commuter e-bikes with removable batteries built for daily riding.
Sources and Further Reading
- U.S. Consumer Product Safety Commission (CPSC), Micromobility Information Center (federal e-bike and lithium-ion battery charging safety guidance): https://www.cpsc.gov/Safety-Education/Safety-Education-Centers/Micromobility-Information-Center
- U.S. Consumer Product Safety Commission (CPSC), Staff Statement on E-Bike Battery Testing and Exponent Report (technical background on original chargers and battery management systems): https://www.cpsc.gov/s3fs-public/CPSC-Staff-Statement-on-e-Bike-Battery-Testing-and-Exponent-Report.pdf
- STOER Bikes, "E-Bike Battery Charging at Work: Safe and Practical" (workplace outlet, ventilation, and periodic monitoring guidance): https://stoerbikes.com/en/e-bike-battery-charging-at-work-safe-and-practical